Do you have issues with Logitech G402 game mouse erratically wobbling on you screen and you do not found any correction?
There is an really easy correction, just use one of these cotton swabs to clean the laser eye.
Mostly technical blogging

Do you have issues with Logitech G402 game mouse erratically wobbling on you screen and you do not found any correction?
There is an really easy correction, just use one of these cotton swabs to clean the laser eye.


Ajattelin että kokeillaampa nyt sairasvuoteelta tällaistakin blogikirjoitusta kun “jonkinverran” on jokaisesta mediasta tätä toitotettu.
Ottamatta nyt sen enempää kantaa halusiko pääministeri vaikuttaa Katera Steeliä auttavasti Terrafame rahoituksella niin aloin miettimään että aika moiselta valehtelijalta mies kuitenkin vaikuttaa.
Aloitetaan nyt Juha Sipilällä itsellään. Hän on syntynyt 1961 ja kertoo kuinka hän 15 vuotiaana (1976) on ollut töissä ukillaan. Ukin (Esa Jauhiainen) yritys on siis Katera Steelin edeltäjä 1961 perustettu Hitsaus- ja levytakomo Ky. Esan lapsia (käsittääkseni) ovat siis Juha Sipilän äiti ja Markku Jauhiainen, Katera Steelin johtohahmoja ja päättäjiä. Sipilän kertomus on tunteikas puhe ennen itsenäisyyspäivää yrittäjyydestä. Pääministerihän on siis lestaadiolainen joten yrittäjyys muiden paheiden ohella tuntuu heillä olevan veressä.
Hypätään sitten ajassa mutkattomasti 20v vielä eteenpäin, Solitra on myyty, miljonääriksi on tultu, on perustettu säästöpossuyritys Fortel Investment Oy aiemmalta nimeltään muuten Jumis Oy (yritetäänköhän tuolla firman nimellä viestiä jotain?). Säästöpossuyrityshän toimii niin että rahat sinne jemmaan ja hoidetaan niin että saadaan paras tuotto kaikella tavalla. Yrityksen päätarkoitus on tietysti siirtää se aikanaan eteenpäin lapsille kokonaan kuten tässä taannoin tapahtui. Ihan vastaavalla tavallahan on tehty Katera Steelinkin osalta ja siirretty sukulaisille eteenpäin.
2010 Sipilä kertoi noista tarinoitaan sedästään, 2011 hän on yrityskaupan sparrarina jolloin Karille ja Markulle jäi 30% ja heidän nuoremmalle polvelle loput ja 5% Fortelille. Sitten kepun puheenjohtajuus, eduskunta ja pääministeriys. Jossain tässä välissä kun oli näitä epäselvyyksiä ja jääviys asioita niin Sipilähän silloin pesi näppärästi kätensä tekemällä sukupolvenvaihdoksen ja myymällä kaikki lapsilleen.
Sitten tulee vielä tunnekuohussa lähetetyt 20 sähköpostia ylelle jonka jälkimainingeissa sanotaan tv-kameroille silmät loistaen että “Ei pienintäkään aikomusta ole ollut missään vaiheessa rajoittaa lehdistön vapautta tai yrittääkkään vaikuttaa siihen mitä yle esittää ja mitä ei.” Tähän voisi sanoa saman kun Shrek esikoiselokuvansa aloituksessa Mike Myersin tai Samuli Edelmanin sanoin: “Kaikenlaista p…..”
No jos nyt sitten otetaan tästä jotain loppupäätelmiä. Tottakai pääministeri on edelleen mukana ja hyvin perillä Fortel Investment Oy toiminnasta. Ehkä ei päivittäisasioissa mutta varmasti hyvin perillä kaikesta. Entä Katera Steel sitten. Tottakai on hyvin perillä yrityksestä ja sen toiminnasta ei siitä ole epäilystäkään. Miksi sitten tästä kaikesta nousee niin iso haloo. Omien kokemuksieni mukaan, jos sinulla on tapana valehdella paljon, käy ennen pitkään niin että jäät siitä kiinni. Silloin lopputulos näyttää juuri tältä, puhut ja kirjoitat itsesi kanssa niin monesti ristiin että luottamus menee. Mielestäni jääviys asioilla ei tässä tapauksessa ole paljoakaan väliä mutta jos luonteen ominaisuuksiin tai tapoihin kuuluu valehtelu niin kyllä itse silloin voisin sanoa että “Arvostukseni Juha Sipilään on nyt täysi nolla”.
Ai niin, pääministerillä on joku kuuluisa häkäpönttöauto johon kuulemma Katera Steel on tehnyt sen kuuluisan häkäpöntön.
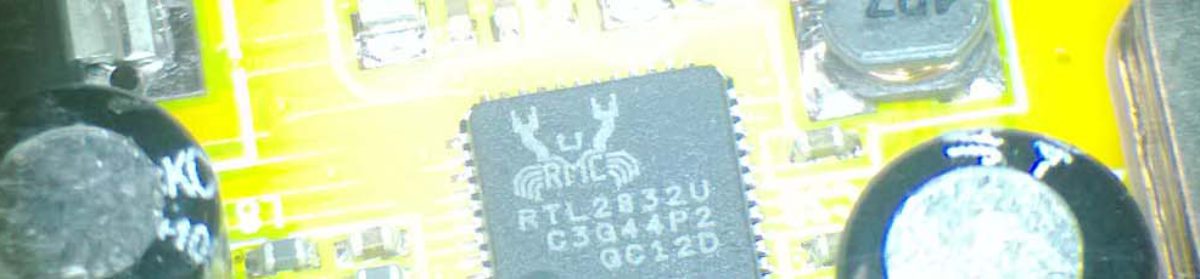
Some point of the repository history of Buffalo linkstation optware, smartmontools got broken and no-one seemd to care enought to fix it properly for the repo.
The reason was gcc optimization bug.
Here is the instructions to fix it from scratch.
Prerequisites are Buffalo Linkstation e.g. LS-QVL like mine, install optware and gcc 4.2.3 for it from optware repo. Then follow this.
Download latest package from here with e.g. lynx directly to buffalo or transfer via other methods.
tar -xvf smartmontools-6.5.tar.gz
cd smartmontools-6.5
./configure

Edit Makefile and replace all -O2 optimization flags with -O0

make
Ok, so now you have working smartctl which you can run from your compile directory with e.g ./smartctl –all -d marvell /dev/sda and it will work. Just copy it e.g. over the non working 5.4 or so.
Hope this helps.
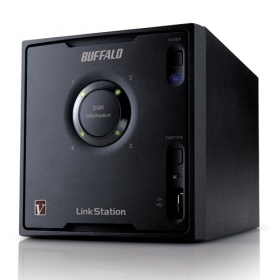
Buffalo Linkstation Pro Quad LS-QVL is remarkable little machine. I have purchased several of these devices and can safely recommend them to everyone. You don’t need to necessarily root them and you can use them as they are, but if you want to take most out of these boxes, then you’ll better do it proper way. This is the complete walk through for that, procedures on setting up Buffalo Linkstation.
First of course follow the basic procedures, unpack, inspect, then plug it in mains and network as described in the Quick Setup Guide. Press the power button of the machine so that the blue led will start blinking and it will go through the disks (Green lights). Then from the disk provided, install NASNavigator2 (I had 2.56 version).
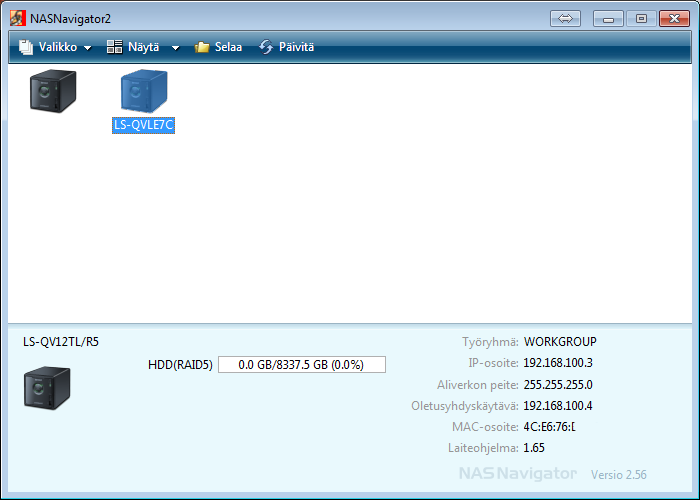
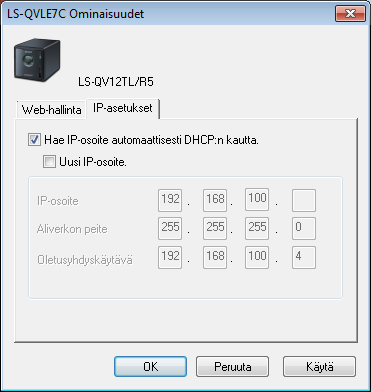
It should find your device and show it in the navigator e.g. LS-QVLE7C. It will pick up the IP from your DHCP server automatically, for me it gave 192.168.100.65. FW Version it showed 1.65. Then I first changed my ip for static 192.168.100.3 ip from properties and ip-settings in NASNavigator2. The default password is password. For me the Finnish version of NASNavigator2 shows like this.
After that you can invoke the web interface with admin and password. You can go go around the webui and look the settings, but I mainly went straight to
System – Maintenance – Firmware Installation page. It shows that you have the latest already, but then open up this page from Buffalo NAS-Central Forums to install Shonks pre modified version of the firmware.
http://forum.buffalo.nas-central.org/viewtopic.php?f=68&t=23603
From there it points you to http://pc.cd/Sx7 pick up the proper firmware. You should be getting ls_series-165-mod1a.rar file which is about 230MB.
Then extract the package to your pc and start LSUpdater.exe. Pick the correct linkstation (if you have many) and click update. Mine was updating from 1.65-3.40 to 1.65-3.41.
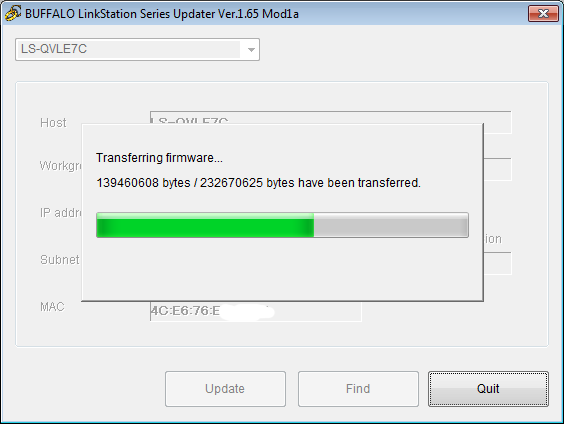
Then it will inform that Linkstation has been rebooted. Please wait… And finally LinkStation has been updated. After that, log in to web console and System – Restore/Erase – Restore Factory defaults – Restore LinkStation.
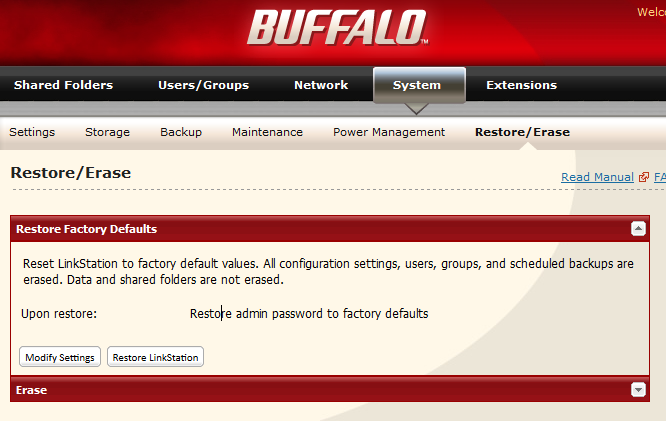 This procedure will remove your root password from the device.
In the process of doing this, you might end up back again on DHCP IP:s so then again do the NASNavigator2 IP Change procedure to change the ip back to what you want.
Then just telnet to your device (ssh won’t work) and log in as root with no password. Then use passwd to change proper secure root password.
Now you should be able to do things in the box (named Nas now)
root@Nas:~# passwd
Enter new UNIX password:
Retype new UNIX password:passwd:
password updated successfully
root@Nas:~# df
Filesystem           1k-blocks      Used Available Use% Mounted on
/dev/md1               4920624    870908   3799760  19% /
udev                     10240       184     10056   2% /dev
/dev/ram1                15360       172     15188   1% /mnt/ram
/dev/md0                992440     30320    962120   3% /boot
/dev/md2             8742533120     34388 8742498732   0% /mnt/array1
This is now the basic setup and your device is rooted. You can also apply these same procedures for upgrading the custom firmware to newer. I will go more detailed on the customization in later posts.
I received today my first Banana Pi boards. The quality looks decent. That means that it is not anything that would pass any QC in Finland. Some of the components and connectors were not straightly aligned and there were quite a lot cold solder joints in the board but it should work.
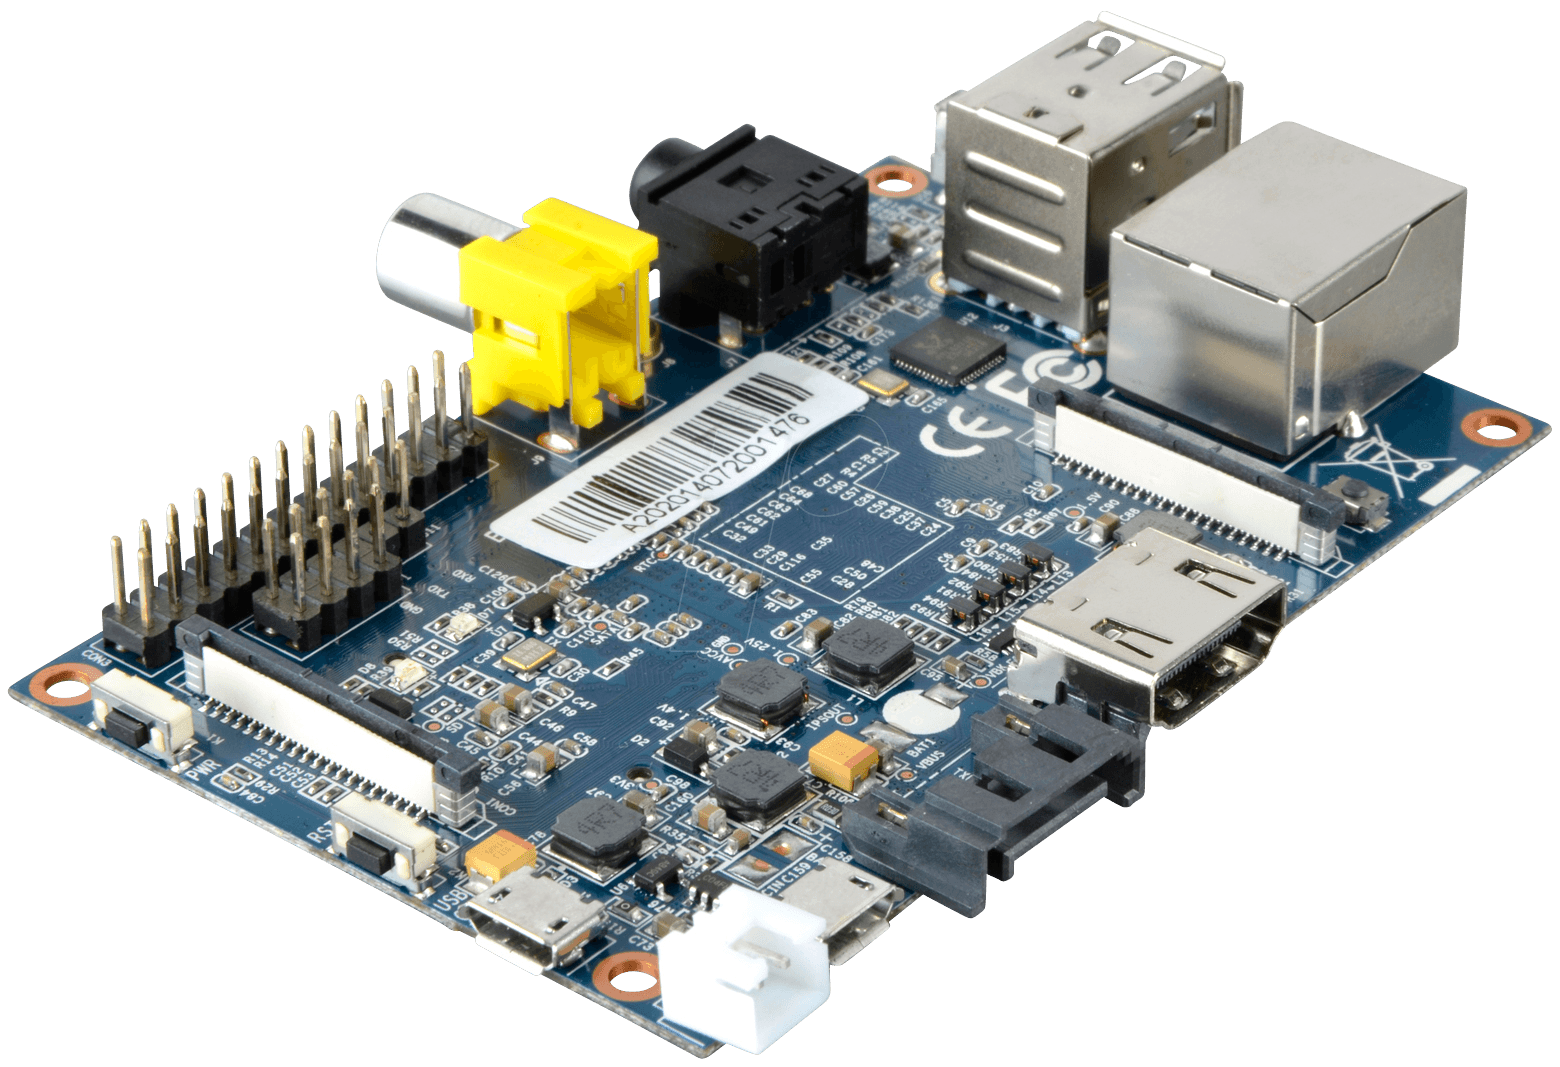
I ordered also enclosures so installed one of them and then for software. I choosed Raspbian as os to give an first try, so went downloading that. From www.lemaker.org and under Resources / Downloads choosed Raspbian_For_BananaPi_v3.1 dated 12:th Aug 2014.
As I’m on mac, then once downloaded
md5 Raspbian_For_BananaPi_v3.1.tgz
MD5 (Raspbian_For_BananaPi_v3.1.tgz) = 22a0b5c23de914f273423b3caa4292f
tar -xvf Raspbian_For_BananaPi_v3.1.tgz
to verify the the md5sum matches the same as on web page and to unpack the image. After that I did following to install it on new empty sd card.
diskutil list
...
/dev/disk1
   #:                       TYPE NAME                    SIZE       IDENTIFIER
   0:     FDisk_partition_scheme                        *3.9 GB     disk1
   1:                 DOS_FAT_32 NO NAME                 3.9 GB     disk1s1

diskutil unmountDisk /dev/disk1
sudo dd bs=65536 if=Raspbian_For_BananaPi_v3_1.img of=/dev/disk1
Notice that dd command takes quite a long time to execute. For me it took 45 minutes (maybe my sd card is really slow). After that I ejected the SD card safely and plugged all the cables to banana pi and booted it with the SD.
Later I did the same for 8GB SD from different wendor with
sudo dd bs=4194304 if=Raspbian_For_BananaPi_v3_1.img of=/dev/disk1
and that took only 38 minutes so it probably is depending on the card speed.
First Nothing happened, kind off. Red powerled was lit, and green was flashing but nothing on screen. Then after some surfing found out that it could be hdmi thing and after changing hdmi cable (which though worked on raspberry pi) to another, I got screen. After some initial playing around.
sudo apt-get update
sudo apt-get install iceweasel
#this is firefox
sudo apt-get install iceweasel browser-plugin-gnash
#this is flash
sudo bpi-config
 Expand filesystem
 Internationalization options
  locale fi_FI.UTF-8
  default fi_FI.UTF-8
  timezone EU/Helsinki
  keyboard Generic 105 PC - Other - Finnish - Finnish - Default - no compose - no
Advanced Options
 Hostname banan1
 ssh enable
Finnish - Reboot Yes
After that when it boots back you should have decent Banana Pi testing environment at your hands.
Quality decent, some unexpected issues with HDMI cable compability, but relatively smooth process to get started.
I’m running Buffalo Linkstation as an home storage for some files. I have previously rooted (to be able to install my own apps) that and installed some opt packages. I also have service from ISP where I can store several Gigabytes of data e.g. for backup purposes.
Recently I finally completed the Duplicity backups, here is how it basically went.
Prerequisites for me was:
– Linux server where you store your files to be backed up (I have Buffalo Linkstation)
– Remote place where you store (I have Kapsi ISP)
For me as I’m using rooted Buffalo Linkstation LS-QVL 8TB I’m using commands like
ipkg install py25-duplicity
ipkg install py25-boto
ipkg install py25-crypto
ipkg install py25-paramiko
I had to install quite many packages but paramiko is the one that I’m actually using (ssh, sftp). This process wasn’t that straight forward and first tries didn’t end up in success, thats why implementing this took so long.
Also prerequisites for duplicity there is librsync GnuPG NcFTP Boto and Python 2.4 or later. Those you will have to install also.
Then I created the following scripts to do the backup.
#!/bin/sh
# duplicity full backup to kapsi

#Email address of recipient. Adjust to suit.
export Email="where_to@send_the_reports.com"

# timestamp for email
date=`date +"%d.%m.%Y %k:%M:%S"`

# Export the PASSPHRASE variable
export PASSPHRASE=Your_secret_password!
export TMPDIR=/opt/tmp/duplicity

# Get the date
repDate=`date "+%Y%m%d_%H%M%S"`

# Cleanup first (anything older than 60 days)
/opt/bin/duplicity-py2.5 remove-older-than 60D -v9 --force scp://account@server.com:22//home/users/account/siilo/backup/duplicity >>/var/log/fullbackup_$repDate.log

# Now do the backup
/opt/bin/duplicity-py2.5 full /mnt/array1/path --asynchronous-upload --volsize 100 --include-globbing-filelist=/mnt/array1/path/cfg/backupaccount.txt scp://account@server.com:22//home/users/account/siilo/backup/duplicity >>/var/log/fullbackup_$repDate.log

# Get the disk space
echo "Availble Disk Space on Server" >> >>/var/log/fullbackup_$repDate.log
echo >>/var/log/fullbackup_$repDate.log
/opt/bin/ssh -p22 account@server.com quota -v -s >> >>/var/log/fullbackup_$repDate.log
/opt/bin/ssh -p22 account@server.com du -h ///home/users/account/siilo/backup/duplicity >>/var/log/fullbackup_$repDate.log

# Mail me the results
cat /var/log/fullbackup_$repDate.log | nail -s "Backup Full [$date]" $Email
–volsize parameter changes the default 25MB filesize to 100MB and –asynchronous-upload starts sending the package immediately once it’s ready and packs the second package. This increases the temporary space needed but makes transfers faster.
I have similar script with incremental option to use in incremental backups.
00 4 1 * * /opt/local/bin/fullbackup.sh
00 4 2-31 * * /opt/local/bin/incrbackup.sh
/mnt/array1/path/Dir1
/mnt/array1/path/Dir2
/mnt/array1/path/Dir3
- /mnt/array1/path/Dir4/misc
- /mnt/array1/path/Dir4/not_important
/mnt/array1/path/Dir4
- /mnt/array1/path/trashbox
- **
On backupaccount.txt file I just say the directories under /mnt/array1/path what I want to be included and excluded. So the /mnt/array1/path/Dir4 gets copied but it excludes few directories. Also in the end there is to exclude trashbox and ** for rest from /mnt/array1/path.
This is basically how the things gets backed up.

– Crypted backups, so you can send them where ever you want without fear of getting your files to wrong hands
– Space and Bandwith efficient. Incrementals are really clever and fast to do even for big file repositories.
– Adaptivity, it supports many different protocols and file format is standard. You can probably have it running same way in the future services also.
I think for my purposes duplicity backups is really good way to do backups to remote location safely.
To have fluent access to securely walk through you servers, I have collected here some helpful instructions. I’m not going to go too detailed and the simplest things but some that I have found useful.
First of the tools, on linux and other unix machines and mac, I use the basic OpenSSH tools that there are, so ssh, scp, ssh-keygen and so on. On Windows I use putty family tools + some extra tools like Connection Managers.
So first create keys like one with passphrase and one without:
ssh-keygen -t rsa -b 4096
Then I rename them some way like adding userid on the name and ppk extension for the private file to make it easier to handle in Windows machines. I also modify the comment string to have something useful there.
On Windows you can use puttygen.exe for the same.
Then of course make sure your private key is only as few places as possible and in trusted places. I keep mine only on my trusted personal devices.
Then with the following command I copied the files to servers where I need them.
cat ~/.ssh/id_rsa_some.pub | ssh userid@servername.fi "cat >> ~/.ssh/authorized_keys"
Now if you need to log on to many machines loops, you can do that with Agent forwarding. In ssh you can simply do this with -A switch, and in Putty you can enable that on the profiles with Connection – SSH – Auth – Allow agent forwarding.
After that you have on your favorite laptop or desktop private file once, and there you will use eg. in Windows pageant to load that key by giving password for authentication only once. Then you will have the agent program running and with those Agent forwarding enabled, you will get the authentication to all your machines.
There is some security considerations here to take in account so you should consider that also when doing this.
I recently noticed that BerryBoot with OpenELEC makes really good combination on your Raspberry Pi and it is also really easy to setup.
Some time ago I purchased couple of RaspberryPi:s. I was waiting once they were comfortably running XBMC in 1080p resolution. I have had them on use with OpenELEC and RaspMC and recently liked OpenELEC a lot. I had to renew and do one installation from scratch.
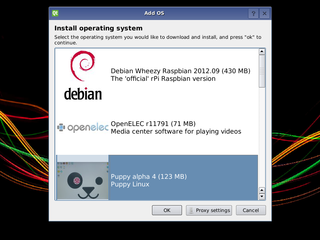
First downloaded BerryBoot. Installation with that goes smoothly, just formatted 8GB SD card to fat and extracted the zip to sd-card. Then plugged in keyboard, mouse, rj45 network cable, hdmi to monitor + Nokia usb charger to feed power. Selected OpenELEC and then some configuring. I added following to config.txt
gpu_mem=128
cma_lwm=16
cma_hwm=32
cma_offline_start=16
gpu_mem_512=256
arm_freq=850
core_freq=400
sdram_freq=400
gpu_freq=300
# Berryboot settings, do not change
kernel=kernel_rpi_aufs.img
initramfs berryboot.img
Once OpenELEC booted up, selected OpenELEC OS Settings and changed Keyboard layout to fi and Hostname to bit better and under Services – SSH – Start ssh server at boot. Then rebooted and after that you can log in as root with password: openelec.
Nowdays nano is bundled with OpenELEC so that you have there default.
Now logging in with ssh you can verify the speed change with cat /sys/devices/system/cpu/cpu0/cpufreq/scaling_cur_freq It should show 850MHz.
More detailed you can get with following command
for src in arm core h264 isp v3d uart pwm emmc pixel vec hdmi dpi ; do echo -e "$src:t$(vcgencmd measure_clock $src)" ; done

arm:    frequency(45)=850000000

core:   frequency(1)=399999000

h264:   frequency(28)=240000000

isp:    frequency(42)=240000000

v3d:    frequency(43)=0

uart:   frequency(22)=3000000

pwm:    frequency(25)=0

emmc:   frequency(47)=100000000

pixel:  frequency(29)=154000000

vec:    frequency(10)=0

hdmi:   frequency(9)=163683000

dpi:    frequency(4)=0
With vcgencmd measure_volts;vcgencmd measure_temp command you can determine the current voltage and chip temperature.
If you wanna really push more, you can try settings in config.txt like:
arm_freq=1050
core_freq=500
sdram_freq=500
over_voltage=6
but try safely one thing at a time. And remember, if you loose your filesystem undetectable, that almost always is because of overclocking or bad power supply. You can find more info from elinux.org RPI Config Overclocking options.
So basicly playing around with BerryBoot and OpenELEC is really easy. The only troublesome things are doing upgrades, as at least for now I haven’t been able to configure BerryBoot to do auto or even manual updates. Hope to get back on that later how to solve it.
A while a go my youngest one accidentaly hit his door room so hard that one of the 7 JPW Mini Monitors of the livingroom home theatre fell down and broke.Plastic tweeter supports broke down and the outer case took some hit also. Tweeter of Mini Monitor was hanging inside the case on the wires. So now I had spare time so together with my daughter we opened the box and took away speaker connectors, tweeter and bass element, also one L coil, C capasitor and R resistor + some acustic foam.We glued back together the tweeter support, although I broke it down 3 more times as the plastic was so hard and fragile.
Previously I had already bought for this project an D-Class amplifier VMA2016 from dx. The specs of VMA2016 are quite good. This was recommended for me by more experienced friend (tnx Petri) to be good to look out. It turned out to be fabulous.

First I marked out the cables and once I had soldered out the tweeter and bass element I had to also soder out the speaker connectors, because I was going to use them for feeding out the passive channel. I connected the speaker to right channel and then with small cables (only had black one at my hands) I soldered the speaker connectors to them and connected to left channel.
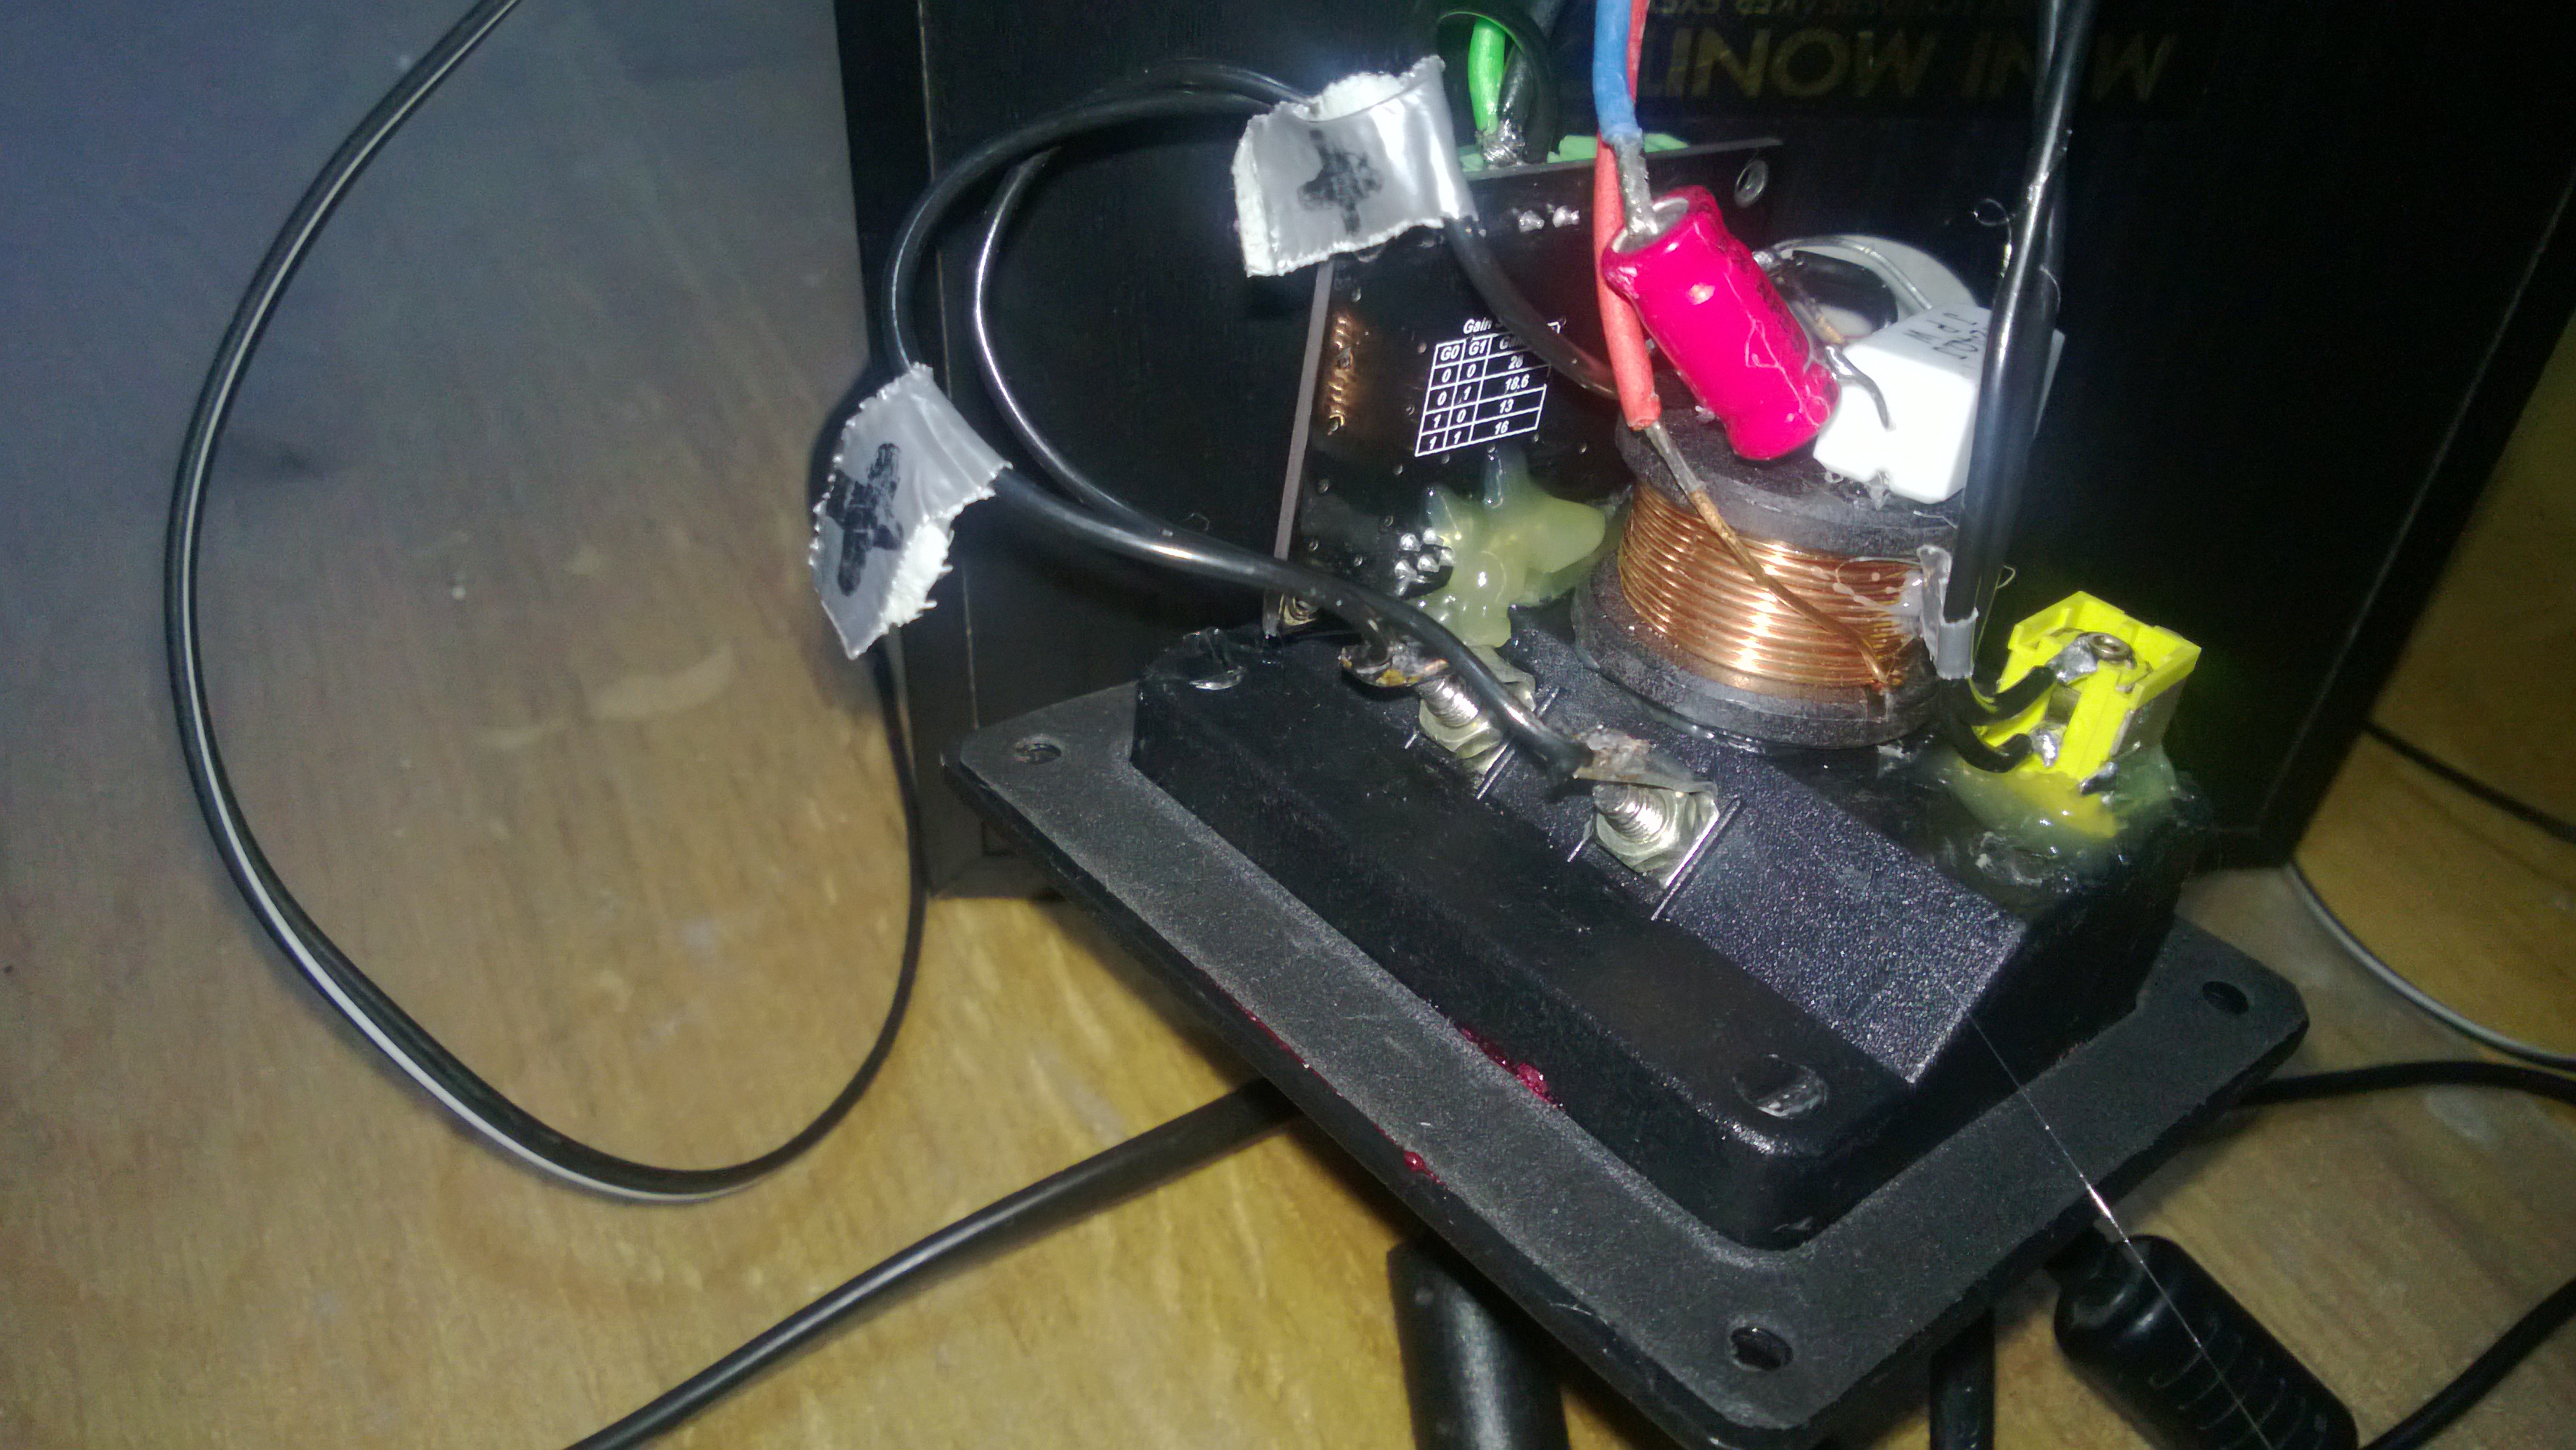
Then from the start I aldready had an Idea of building up everything inside the speaker except the power source. So I also soldered and old IBM thinkpad 16V connector to feed the power in.
I did the design so that everything is connected to that plastic plate on the back of speaker, because If I ever broke down the amplifier or the speakers, It will be way easier to repair and change. I drilled 2 abt. 6mm holes for the 3.5mm stereoplug and for the power connector. I had to drill that big for the line in also as I noticed that otherwise it might be so that I can’t push the 3.5mm plug long enough to have proper stereo connection on it.
Then I used hotglue pistol for attaching the circuit board + the power connector. I tried to seal them as good as possible, but the line in terminal you actually cant seal air tight because of the structure and the mechanical work of the connector.
Then with minor testing before assembling JPW Mini Monitors back everything sounded fine. Then I put some stickers to warn not to connect the active speaker to amplifier as the only things how you notice that is the extra power + line in connectors + the stickers. You can feed wide range of power, I have heard that 8.5V works, but it can take as much as 24V also in. I have an plan to use this also on picnics, just by attaching some 18650 LiPO batteries (3 to 5 cells) with welcro on back of the speaker.
![WP_20130416_001[1]](http://www.lehtosaari.fi/lehtosaari/veli-pekka/wp-content/uploads/sites/3/2013/04/WP_20130416_0011.jpg)
My new Active JPW Mini Monitor speakers work really well and all you need is the 16V Thinkpad powersupply or equivalent with that small yellow connector, 3.5mm to 3.5mm cable for audio in. If you want stereo, you need regular speaker cables + passive JPW Mini monitor speaker to connect the passive one to active one.
For the “carry around” option I will do some additions later on to have it easier to carry around.
Then some quick sound and video samples in youtube, the sound is distorting because of the phone microphone but they sound actually way better on live. Really happy on the outcome how my new Active JPW Mini Monitor came out. 🙂
Technical specs should be something like:
Impedance: 6 Ohms
Power Handling: 70 Wats
Sensitivity 1m/1w: 87dB
THD+N: 0.07% (4W*2, 8 Ohm load)
SNR: >90dB
Quiescent Current: 24mA
Gain is set to: 30dB
Max power: ~10W x 2
If you have tried to play on your Raspberry Pi XBMC mpeg2 content like DVB-T or DVB-T2 stored *.ts content, you might have noticed that only audio is played but not video. For this you will have to purchase licenses and install them.
You can start from Raspberry Pi Store. You will have to ssh to you Raspberry Pi and run following and pick the Serial.
root ~ # cat /proc/cpuinfo

Processor       : ARMv6-compatible processor rev 7 (v6l)

BogoMIPS        : 697.95

Features        : swp half thumb fastmult vfp edsp java tls

CPU implementer : 0x41

CPU architecture: 7

CPU variant     : 0x0

CPU part        : 0xb76

CPU revision    : 7
Hardware : BCM2708
Revision : 000e
Serial : 0000000048421123
root ~ #
I’m doing this for several devices + also VC-1 codecs at the same time. Once you have all the serials needed, just add the serials to and purchase the licenses.
I didn’t found out other than paypal as payment. You will receive some email with instructions. Once you get the actual keys you just add following lines to config.txt. First one is for MPEG2 and second one for VC-1.
decode_MPG2=0x12345678
decode_WVC1=0x12345678
And that should be it.